· tutorials · 11 min read
Developing a Telegram Bot with C# and the Metropolitan Museum of Art's API
I’ve been using Telegram more often recently to speak with friends, and after reading an article on Twitter bots I became inspired to try my hand at creating a Telegram bot. A few days later, I stumbled upon the Metropolitan Museum of Art Collection API, and suddenly I had a great idea - to make a simple bot which displays artworks from the Met’s collection! The Met has an impressive collection consisting of data and 406,000 images of works from their collection, all available for use without copyright or restriction and licensed under Creative Commons Zero. Not only does this project make for a useful way to learn the basics of Telegram bot development, it also serves a practical purpose of exposing myself to interesting artworks that I may not have otherwise known about!
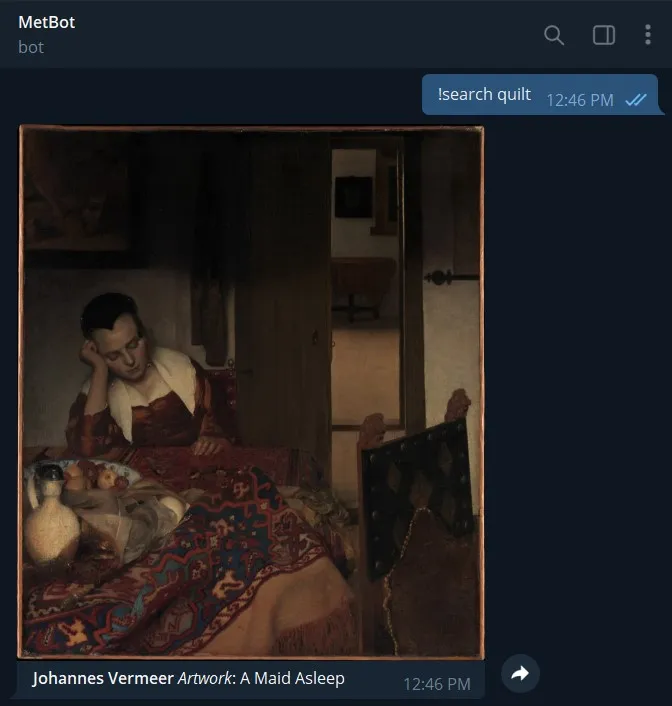
When you finish this tutorial, you should have a bot which looks similar to the following:
Requesting a random artwork from the collection: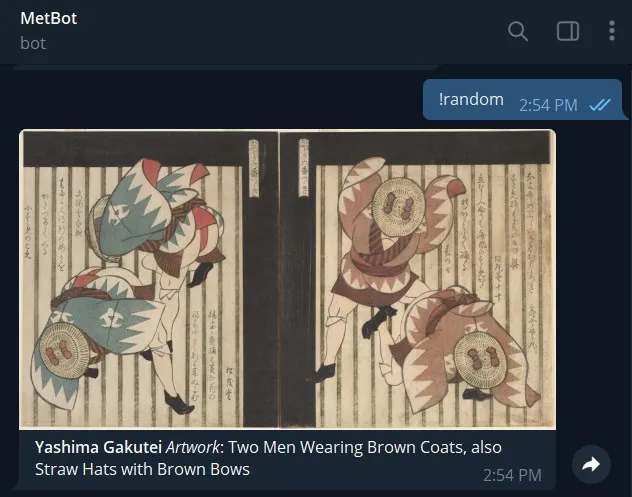
You can find the entire codebase for MetBot on GitHub (feel free to give it a star if you like it!).
First Steps
To interface with the Telegram API, I used the Telegram.Bot library, and getting started was simple. After installing the NuGet package, the first thing I did was to create my bot using the Telegram Botfather in order to obtain my access token. Access token in hand, I started a new console project in Visual Studio and then entered the following test code into my Program.cs:
using Telegram.Bot;

var botClient = new TelegramBotClient("{YOUR_ACCESS_TOKEN_HERE}");

var me = await botClient.GetMeAsync();
Console.WriteLine($"Hello, World! I am bot {me.Id} and my name is {me.FirstName}.");
This code creates a new instance of your bot and then displays its ID and name. If you see something similar to the following in your terminal output, then congratulations, your bot is working!
Hello, World! I am bot 6845241 and my name is MetBot.Developing the Bot Engine
Now that we have our basic example working, the next step is to start working on a class which will manage the bot’s event listener and handle interactions with users. Create a class named BotEngine, and then add the following using statements:
using Telegram.Bot;
using Telegram.Bot.Exceptions;
using Telegram.Bot.Polling;
using Telegram.Bot.Types;
using Telegram.Bot.Types.Enums;
Next, add a field where we will store the bot’s lifecycle, followed by a constructor where we can pass a TelegramBotClient instance:
private readonly TelegramBotClient _botClient;

public BotEngine(TelegramBotClient botClient)
    {
        _botClient = botClient;
    }
We will now create a method which will listen for messages that are sent from users to the bot. To do so, add the following code below the constructor:
// Create a listener so that we can wait for messages to be sent to the bot
public async Task ListenForMessagesAsync()
{
    using var cts = new CancellationTokenSource();

    var receiverOptions = new ReceiverOptions
    {
        AllowedUpdates = Array.Empty<UpdateType>() // receive all update types
    };
    _botClient.StartReceiving(
        updateHandler: HandleUpdateAsync,
        pollingErrorHandler: HandlePollingErrorAsync,
        receiverOptions: receiverOptions,
        cancellationToken: cts.Token
    );

    var me = await _botClient.GetMeAsync();

    Console.WriteLine($"Start listening for @{me.Username}");
    Console.ReadLine();
}
One thing to note in the above code is that StartReceiving does not block the caller thread as receiving is done on the ThreadPool.
We will now need to create two new methods: HandleUpdateAsync() in order to process messages received by users, and HandlePollingErrorAsync() which will handle any polling errors we receive from telegram. Below ListenForMessagesAsync(), add the following code:
private async Task HandleUpdateAsync(ITelegramBotClient botClient, Update update, CancellationToken cancellationToken)
{
    // Only process Message updates
    if (update.Message is not { } message)
    {
        return;
    }

    // Only process text messages
    if (message.Text is not { } messageText)
    {
        return;
    }

    Console.WriteLine($"Received a '{messageText}' message in chat {message.Chat.Id}.");
}
Now, whenever we receive a message update in the form of a text-only message, the bot will notify us in the console like so:
Received a 'Hi bot!' message in chat 2089802593.Next, add the logic for HandlePollingErrorAsync():
private Task HandlePollingErrorAsync(ITelegramBotClient botClient, Exception exception, CancellationToken cancellationToken)
{
    var ErrorMessage = exception switch
    {
        ApiRequestException apiRequestException
            => $"Telegram API Error:\n[{apiRequestException.ErrorCode}]\n{apiRequestException.Message}",
        _ => exception.ToString()
    };

    Console.WriteLine(ErrorMessage);
    return Task.CompletedTask;
}
Now we can edit our Program.cs file so that we can run the bot:
var botClient = new TelegramBotClient("Your access token here");

// Create a new bot instance
var metBot = new BotEngine(botClient);

// Listen for messages sent to the bot
await metBot.ListenForMessagesAsync();
We now have a bot which listens for messages and informs us in the console when a text-only message is sent to it!
Pulling Data from the Met Collection API
Now that we have the basic bot functionality working, the next step is to create a class which will consume the data we pull from the Met Collection API. Taking a look at the Met Museum’s API documentation, there are three endpoints which are of interest to us. They are:
- Objects: A listing of all valid Object IDs available for access.
- Object: A record for an object, containing all open access data about that object, including its image (if the image is available under Open Access)
- Search: A listing of all Object IDs for objects that contain the search query within the object’s data
With these three endpoints we will be able to pull random images (from the objects list), search for images, and get details about a specific object. All three endpoints are exposed as plain JSON data, and so we will use the built-in System.Text.Json library to deserialize them. In order to handle deserialization, create a Models folder inside your project, and create the following two files in it:
- CollectionObjects.cs - To hold all the objects contained in the collection or search query
- CollectionItem.cs - To manage single items from the art collection
Next, we will use the handy JSON2CSharp tool in order to turn the JSON responses into classes. Visit the following endpoints, copy the code, and then paste the result into the respective classes. You’ll need to rename each “Root” class to match the name of the file (eg: Root -> CollectionObject in CollectionObject.cs):
- Objects endpoint
- Object endpoint - Copy the JSON contained in the example object response
Alternatively, you can just copy my classes from the MetBot repository. Note that we don’t need to create a model for the search endpoint as it returns the same type of response as the objects endpoint so we can just use the same class.
Now that we have our models setup, the next step is to create a folder called MetApi inside our project. Then, inside that folder, create an interface called IMetApi. We will be using an interface for the MetApi as this encourages loose coupling of our code and also allows it to be tested later using a mock class. Inside IMetApi, paste the following code:
public interface IMetApi
{
    Task<CollectionObjects> GetCollectionObjectsAsync();
    Task<CollectionItem> GetCollectionItemAsync(string objectNum);
    Task<CollectionObjects> SearchCollectionAsync(string query);
}
As you can see, there are going to be three public functions that we need to code in our MetApi class - one to get all objects from the collection, one to get a single item using an object number, and one to search the entire collection.
Next, create a MetAPI class inside our MetApi folder and paste the following code in:
public class MetApi : IMetApi
{
    private static HttpClient _httpClient = new();
    private static readonly string _baseUrl = "https://collectionapi.metmuseum.org/public/collection/v1";

    private async Task<string> GetResponseAsync(string endpoint)
    {
        var returnMessage = await _httpClient.GetAsync(_baseUrl + (endpoint ?? "")).ConfigureAwait(false);

        return await returnMessage.Content.ReadAsStringAsync();
    }
}
The above code creates a private method called GetResponseAsync() which uses the HttpClient class to get the raw data we need from the API. Each of the next three methods will use GetResponseAsync() in order to construct their requests to the Met’s API. With this code in place, add in the following three methods below GetResponseAsync():
public async Task<CollectionObjects> GetCollectionObjectsAsync()
{
    var jsonResponse = await GetResponseAsync("/objects");
    var collectionObjects = JsonSerializer.Deserialize<CollectionObjects>(jsonResponse);

    return collectionObjects ?? throw new ArgumentException("Error returning collection objects");
}

public async Task<CollectionItem> GetCollectionItemAsync(string objectNum)
{
    var jsonResponse = await GetResponseAsync("/objects/" + objectNum);
    var collectionItem = JsonSerializer.Deserialize<CollectionItem>(jsonResponse);

    return collectionItem ?? throw new ArgumentException("Error returning collection item");
}

public async Task<CollectionObjects> SearchCollectionAsync(string query)
{
    var jsonResponse = await GetResponseAsync("/search?q=" + query + "&hasImages=true");
    var collectionObjects = JsonSerializer.Deserialize<CollectionObjects>(jsonResponse);

    return collectionObjects ?? throw new ArgumentException("Error returning collection item");
}
Each of these methods is quite simlar to the others except that they deserialize a different endpoint. With this code in place, we are now ready to proceed to the next step!
Connecting our BotEngine to our Met API Interface
Now that we’ve created our IMetApi interface, the next step is to use it in order to download images and display them to the user upon receipt of a command. For this guide, we will have the bot respond to the following two commands:
- !random - Show the user a random image from the Metropolitan Museum of Art’s collection
- !search <query> - Show the user an image which is associated with their search query
Inside our BotEngine class, add the following lines of code below Console.WriteLine($"Received a '{messageText}' message in chat {message.Chat.Id}.");
if (message.Text == "!random")
{
    var randomCollectionItem = await RandomImageRequestAsync();

    await SendPhotoMessageAsync(botClient, message, randomCollectionItem, cancellationToken);
}

if (message.Text.Contains("!search"))
{
    var collectionItem = await SearchImageRequestAsync(message);

    await SendPhotoMessageAsync(botClient, message, collectionItem, cancellationToken);
}
We now need to create the methods referenced above in order for our code to work. Let’s start with RandomImageRequestAsync().
// Returns a random artwork from the entire collection
private static async Task<CollectionItem> RandomImageRequestAsync()
{
    var objectList = await _metApi.GetCollectionObjectsAsync();

    // Keep getting new items from the collection until we find one with an image
    var validImage = false;

    while (!validImage)
    {
        var collectionObject = HelperMethods.RandomNumberFromList(objectList.objectIDs);

        var collectionItem = await _metApi.GetCollectionItemAsync(collectionObject.ToString());

        if (!string.IsNullOrEmpty(collectionItem.primaryImage))
        {
            validImage = true;

            return collectionItem;
        }
    }

    // Probably not the best way to handle this, will need to change it at some point.
    throw new Exception("Error: Can't get random image");
}
One of the challenges I ran into while looking at the objects endpoint was that although it seems like the objects are ordered sequentially, there are actually gaps in between some of the Ids (for example: 1704, 1707 with no ObjectIDs in between). In order to fix this, I created a HelperMethods class which contains the following code:
public static int RandomNumberFromList(List<int> numList)
{
    var rnd = new Random();
    int rndIndex = rnd.Next(numList.Count);
    int random = numList[rndIndex];

    return random;
}
By passing in the objectList, RandomNumberFromList() selects a random element inside the list and returns it to RandomImageRequestAsync(). This way, we’re always ensuring that we get an element that exists in the list!
Another complication was that not all the objects in the collection have an image associated with them, and so we need to use a while loop which checks to see if the collectionItem has an image associated with it. If it doesn’t, we try getting another object from the collection. We don’t have this problem with the search queries, as we can add a query string called &hasImages=true to that endpoint in order to ensure we only return a list of results which have images associated with them.
The next step is to create our SearchImageRequestAsync() method, which is a lot like RandomImageRequestAsync() but simpler:
private static async Task<CollectionItem> SearchImageRequestAsync(Message message)
{
    string[] s = message.Text.Split(" ");

    var searchList = await _metApi.SearchCollectionAsync(s[1]);

    var collectionObject = HelperMethods.RandomNumberFromList(searchList.objectIDs);

    var collectionItem = await _metApi.GetCollectionItemAsync(collectionObject.ToString());

    return collectionItem;
}
Note the use of .Split() here in order to parse things so that we separate our !search command from the user’s query. This implementation means that only the first word that the user inputs will be used to search the collection.
The final method we need to code is SendPhotoMessageAsync() which is a wrapper around the Telegram bot client’s SendPhotoAsync() method. Using this method allows us to eliminate some duplicate code that we would otherwise have:
private static async Task SendPhotoMessageAsync(ITelegramBotClient botClient, Message message, CollectionItem collectionItem, CancellationToken cancellationToken)
{
    Message sendArtwork = await botClient.SendPhotoAsync(
        chatId: message.Chat.Id,
        photo: collectionItem.primaryImage,
        caption: "<b>" + collectionItem.artistDisplayName + "</b>" + " <i>Artwork</i>: " + collectionItem.title,
        parseMode: ParseMode.Html,
        cancellationToken: cancellationToken);
}
Lastly, we will need to add an additional field for the IMetApi, as well as modify our constructor. The top of your BotEngine class should now look like this:
private readonly TelegramBotClient _botClient;
private static IMetApi? _metApi;

public BotEngine(TelegramBotClient botClient, IMetApi metApi)
{
    _botClient = botClient;
    _metApi = metApi;
}
We’ll also need to modify our Program.cs to account for these changes:
var metApi = new MetApi();
var botClient = new TelegramBotClient(AccessTokens.Telegram);

// Create a new bot instance
var metBot = new BotEngine(botClient, metApi);

// Listen for messages sent to the bot
await metBot.ListenForMessagesAsync();
Conclusion
Congratulations! By this point, we now have a working Telegram bot which displays images from the Metropolitan Museum of Art’s collection when prompted. If you’d like, you can view the full code for MetBot on GitHub. This simple project demonstrates a practical example of how you can use the Telegram.Bot API in order to create some cool and useful Telegram bots using C# and .NET. As an extension to this project, it would also be fun to implement a custom keyboard to have the bot display commands that way!