· tutorials · 8 min read
Writing a Linnstrument Companion App with SwiftUI and AudioKit (Part 1)
For the past two years, I’ve been learning to play the Linnstrument, an expressive MIDI controller for musical performance. One thing I was always wished I had when I had just started learning was a graphical tool to display the notes I was pressing on the Linnstrument on my computer screen so that I could see exactly what note or I was pressing. Now with my newfound Swift skills, I decided to make this a reality! Here’s what the finished product looks like so far with three notes pressed at once:
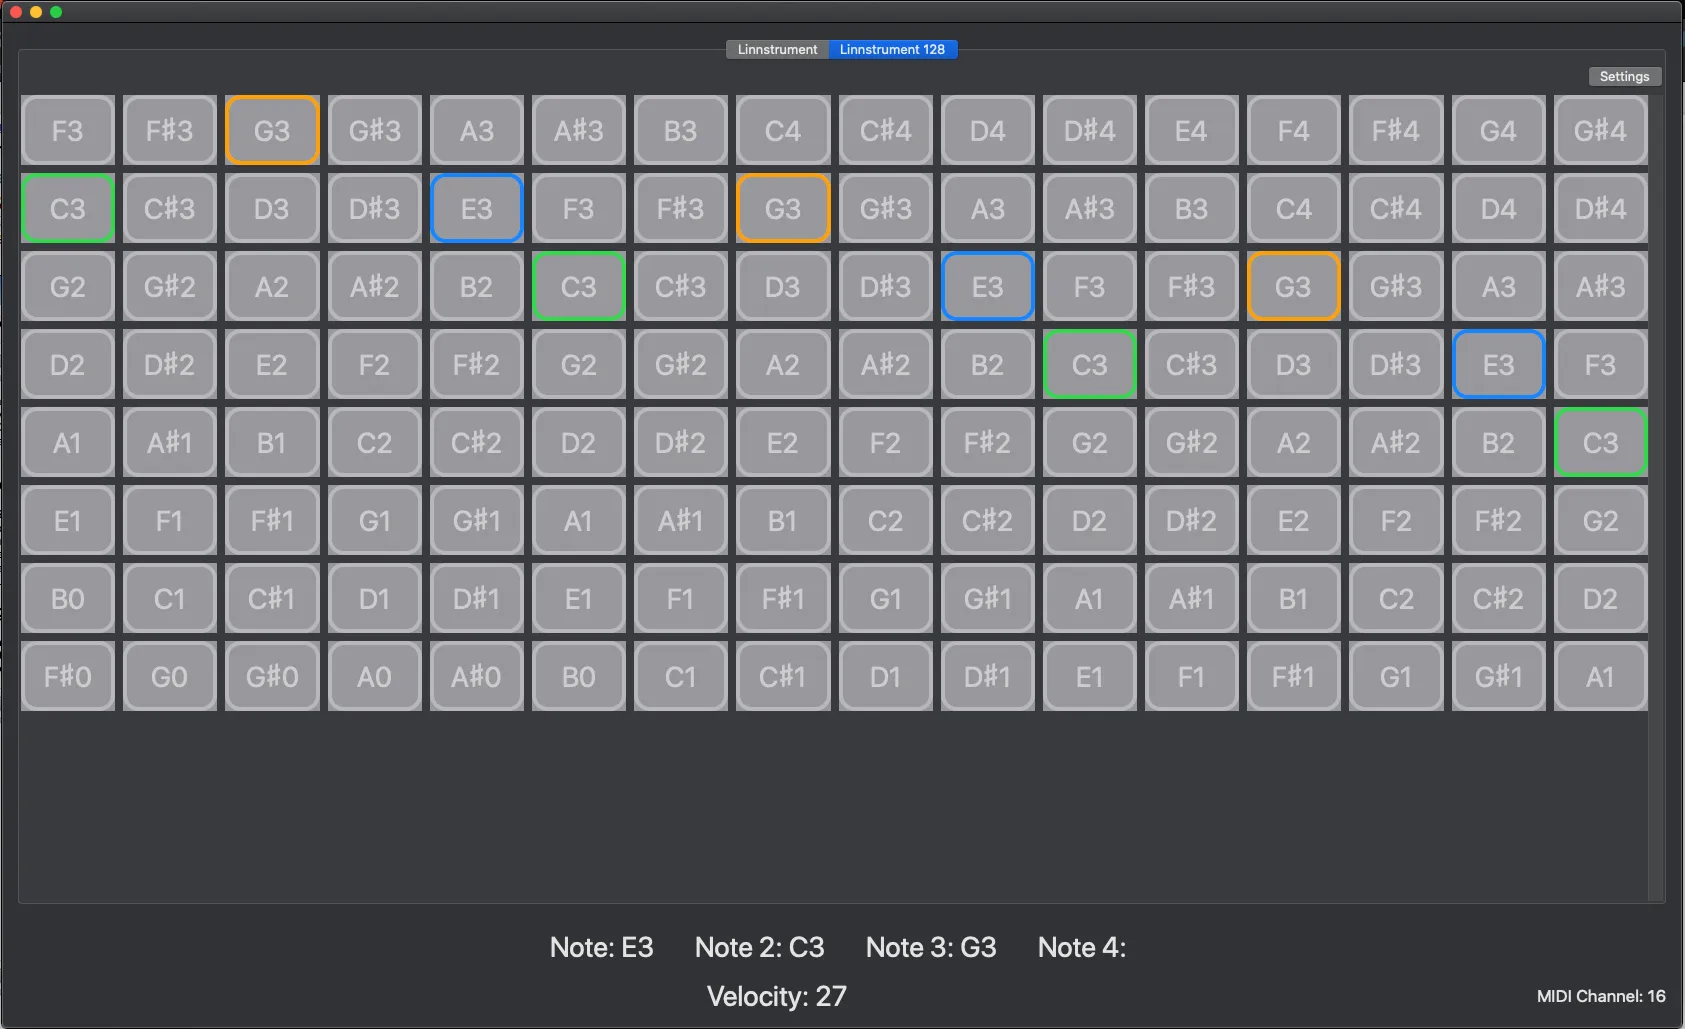
Aside from displaying the notes pressed, I also implemented a basic synthesis engine so that the app plays actual notes when keys are pressed!
There’s two models of Linnstrument, the 128 (four octaves) and the 200 (five octaves). Both use all fourths tuning, but for the purposes of this guide I’m going to outline the process for only the LS 128 (the LS 200 code is essentially the same, except mapped to a 200 note grid). To best follow along, I suggest taking a look at the project sourcecode for reference while you read.
Step one was to determine the basic app design. Because I find music production to be a pain on iOS devices (for a multitude of reasons), I use my Macbook Pro instead and so I decided to go with a Mac SwiftUI app. With a platform in mind, I needed a framework to receive MIDI note messages from the Linnstrument, and for this I chose AudioKit. AudioKit is an audio synthesis, processing, and analysis platform for iOS, macOS, and tvOS. The underlying architecture of AudioKit is CSound, and so aside from offering MIDI IO it also has great audio synthesis capabilities.
Setting up MIDI input with AudioKit
Once I setup a fresh Xcode, the next step was to use AudioKit to listen for MIDI input from my Linnstrument. Using AudioKit is a little different than what I’m normally used to, and after doing some Googling I came across this StackExchange post on the recommended way to manage AudioKit’s lifecycle, which is to create a singleton class. Although the singleton design pattern is not typically a good one for most use cases, its perfect here as AudioKit’s processing pipeline needs to happen as a single instance.
Keeping in line with AudioKit naming conventions, I created a Conductor class using the singleton pattern and got to work implementing MIDI input. To do so, I needed to first make the Conductor class conform to the AKMIDIListener protocol and then adding a listener, which I did here in the Conductor init method:
init() {
        midi.openInput(name: "Session 1")
        midi.addListener(self)
    }
This code opens MIDI input listening under the name “Session 1” and then adds a listener (which is self in this case). You can extend the listener with your own methods, but for now the basics will work just to test input.
Next, I needed to implement two methods, receivedMIDINoteOn() and receivedMIDINoteOff(). These methods listen for MIDI input and then perform an action. Following the AudioKit developer documentation, I came up with the following:
 func receivedMIDINoteOn(noteNumber: MIDINoteNumber,
    velocity: MIDIVelocity,
    channel: MIDIChannel,
    portID: MIDIUniqueID?,
    offset: MIDITimeStamp) {

    print("Playing MIDI note number: \(noteNumber)")
}

func receivedMIDINoteOff(noteNumber: MIDINoteNumber,
        velocity: MIDIVelocity,
        channel: MIDIChannel,
        portID: MIDIUniqueID?,
        offset: MIDITimeStamp) {
}
Now, with the minimum amount of functionality needed for IO, I ran the program and checked the output in the console as I pressed buttons on my connected Linnstrument:
LinnstrumentHelper[82050:4105308] [midi] AKMIDI.swift:init():53:Initializing MIDI (AKMIDI.swift:init():53)

LinnstrumentHelper[82050:4105308] [plugin] AddInstanceForFactory: No factory registered for id <CFUUID 0x60000025bb60> F8BB1C28-BAE8-11D6-9C31-00039315CD46

Playing note number: 78
Playing note number: 93
Playing note number: 72
Looks like the MIDI input feature is now working, yay! However, although MIDI input is now working, the receivedMIDINoteOn() function is only set to print the note numbers to the console. As I’m using SwiftUI for the UI elements of the app, another solution would be needed, and fortunately Apple provided the tools to do just that through the Combine Framework to handle asynchronous events. Fortunately, writing the CU Libraries iOS app gave me some experience using the combine framework. To get my model to update my SwiftUI view, I implemented the ObservableObject protocol in my Conductor class and added in the following variable to keep track of the current note pressed:
@Published var noteNumber: UInt8 = 0Next, In my ContentView, I created a new EnvironmentObject and then added a text entry
  struct ContentView: View {

      @EnvironmentObject var conductor: Conductor

      var body: some View {
          VStack {
              Text("Notenumber: \(conductor.noteNumber)")

              .frame(maxWidth: .infinity, maxHeight: .infinity)
          }
      }
  }
Because we cannot update our published variable noteNumber from a background thread, we need to make use of the dispatch queue to push the changes to the main thread. We need to both assign and unassign a MIDI number when a button is pressed or depressed:
 func receivedMIDINoteOn(noteNumber: MIDINoteNumber,
        velocity: MIDIVelocity,
        channel: MIDIChannel,
        portID: MIDIUniqueID?,
        offset: MIDITimeStamp) {

        DispatchQueue.main.async {
            self.noteNumber = noteNumber
        }

func receivedMIDINoteOff(noteNumber: MIDINoteNumber,
        velocity: MIDIVelocity,
        channel: MIDIChannel,
        portID: MIDIUniqueID?,
        offset: MIDITimeStamp) {

        DispatchQueue.main.async {
            self.noteNumber = 0
        }
After running the code and pressing a button on my linnstrument, I saw the following in my SwiftUI view:
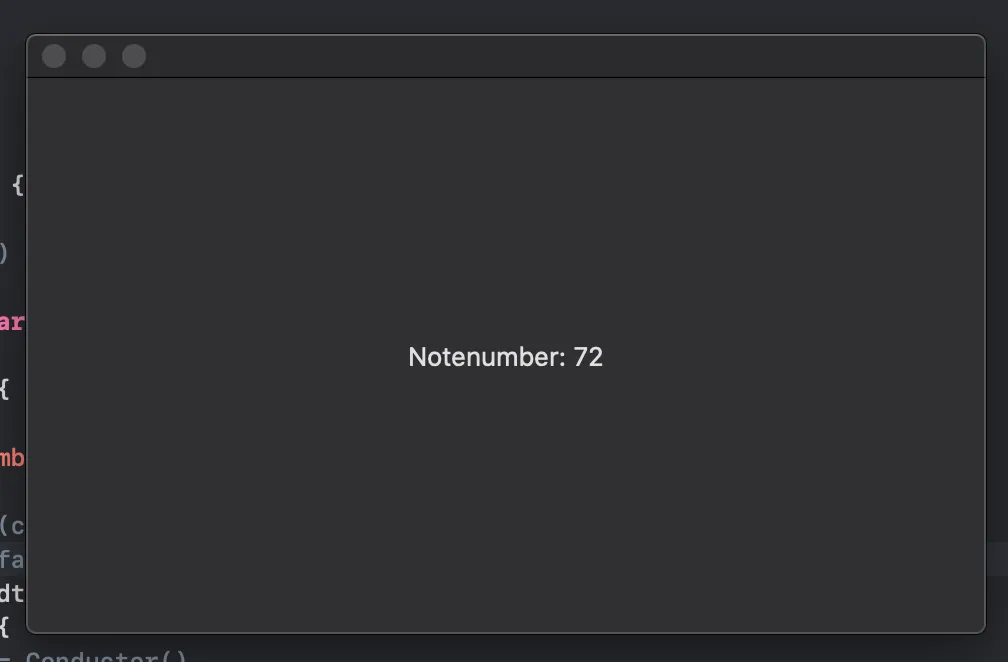
Success! However, what happens when a user presses multiple buttons at the same time? Unfortunately, using a single variable won’t work here, so instead I added some functionality to the receivedMIDINoteOn(), adding all currently pressed numbers to a set, as well as remove them afterwards. I did so by adding the followingline to the receivedMIDINoteOn() dispatch queue:
self.notesHeld.insert(noteNumber)As well as this line to receivedMIDINoteOff():
self.notesHeld.remove(noteNumber)Now anytime more than one note is pressed, each note will appear in the notesHeld set. I later used this same functionality to capture velocity display it onscreen.
Creating the Sound Engine
Creating the sound engine was fairly simple, as I made use of AudioKit’s synthesizer. Just below my midiEngine instance in my Conductor class, I added the following line to create a new synth with some reasonable presets:
let synth = AKSynth(masterVolume: 0.5, pitchBend: 0.0, vibratoDepth: 0.0, filterCutoff: 2.0, filterStrength: 0.5, filterResonance: 0.0, attackDuration: 0.1, decayDuration: 0.0, sustainLevel: 1.0, releaseDuration: 0.2, filterEnable: true)Next, I added the synth engine methods to the bottom of my conductor class:
func playNote(noteNumber: UInt8, velocity: UInt8) {
         synth.play(noteNumber: noteNumber, velocity: velocity)
       }

       func stopNote(noteNumber: UInt8) {
         synth.stop(noteNumber: noteNumber)
       }
I then wired up the synth to my MIDI input by adding the following line to my receivedMIDINoteOn() method:
self.playNote(noteNumber: noteNumber, velocity: velocity)and then the equivalent stop note in receivedMIDINoteOff():
self.stopNote(noteNumber: noteNumber)Now when I ran the program, I was able to get sound whenever I pressed a note!
Building a Grid in SwiftUI
With MIDI IO now working and the Conductor class passing data to our View through ObservableObjects, it was now time to start thinking about the note layout. The Linnstrument is available in two models, a 200 note 5 octave version, and a more portable 128 note version. As I wanted to support both Linnstrument models, I created a tabview in my ContentView for both versions linking to two newly created views:
 TabView {

    PlayingSurfaceView()
    .tabItem {
        Text("Linnstrument")
    }

     SmallSurfaceView()
     .tabItem {
        Text("Linnstrument 128")
     }
 }
Within each of these views, I needed to find a way to create a grid layout. My initial thought was to use a loop to generate rectangles, but I found a much better solution using SwiftUI Grid. After installing the library, I created some new structs to implement a modular grid. The first was called Item, and it contained the necessary information for each element of the grid. This included an ID, color, and number:
struct Item: Identifiable {

    let number: Int
    let id: UUID = UUID()
    let color: Color = .gray
}
I also added an array of note names so that MIDI notes would display on each element.
Next, I needed to generate the grid. For the 128-note Linnstrument grid, I added a ScrollView with the following code inside my SmallPlayingSurfaceView. The ScrollView isn’t entirely necessary, but allows scrolling should the window be too small to display all the grid elements:
 ScrollView(style.axes) {
    Grid(items) { item in
        Card(title: "\(item.number)", color: item.color)
        .onTapGesture {
            self.selection = item.number
        }
    }
}
I also placed the following state variables at the top of the struct in order to keep track of how many cards should be generated, as well as the rules for generating the rows and columns:
@State var items: [Item] = (0...127).map { Item(number: $0)
@State var style = ModularGridStyle(columns: 20, rows: .fixed(60))
With this code in place, I was able to generate the following grid:
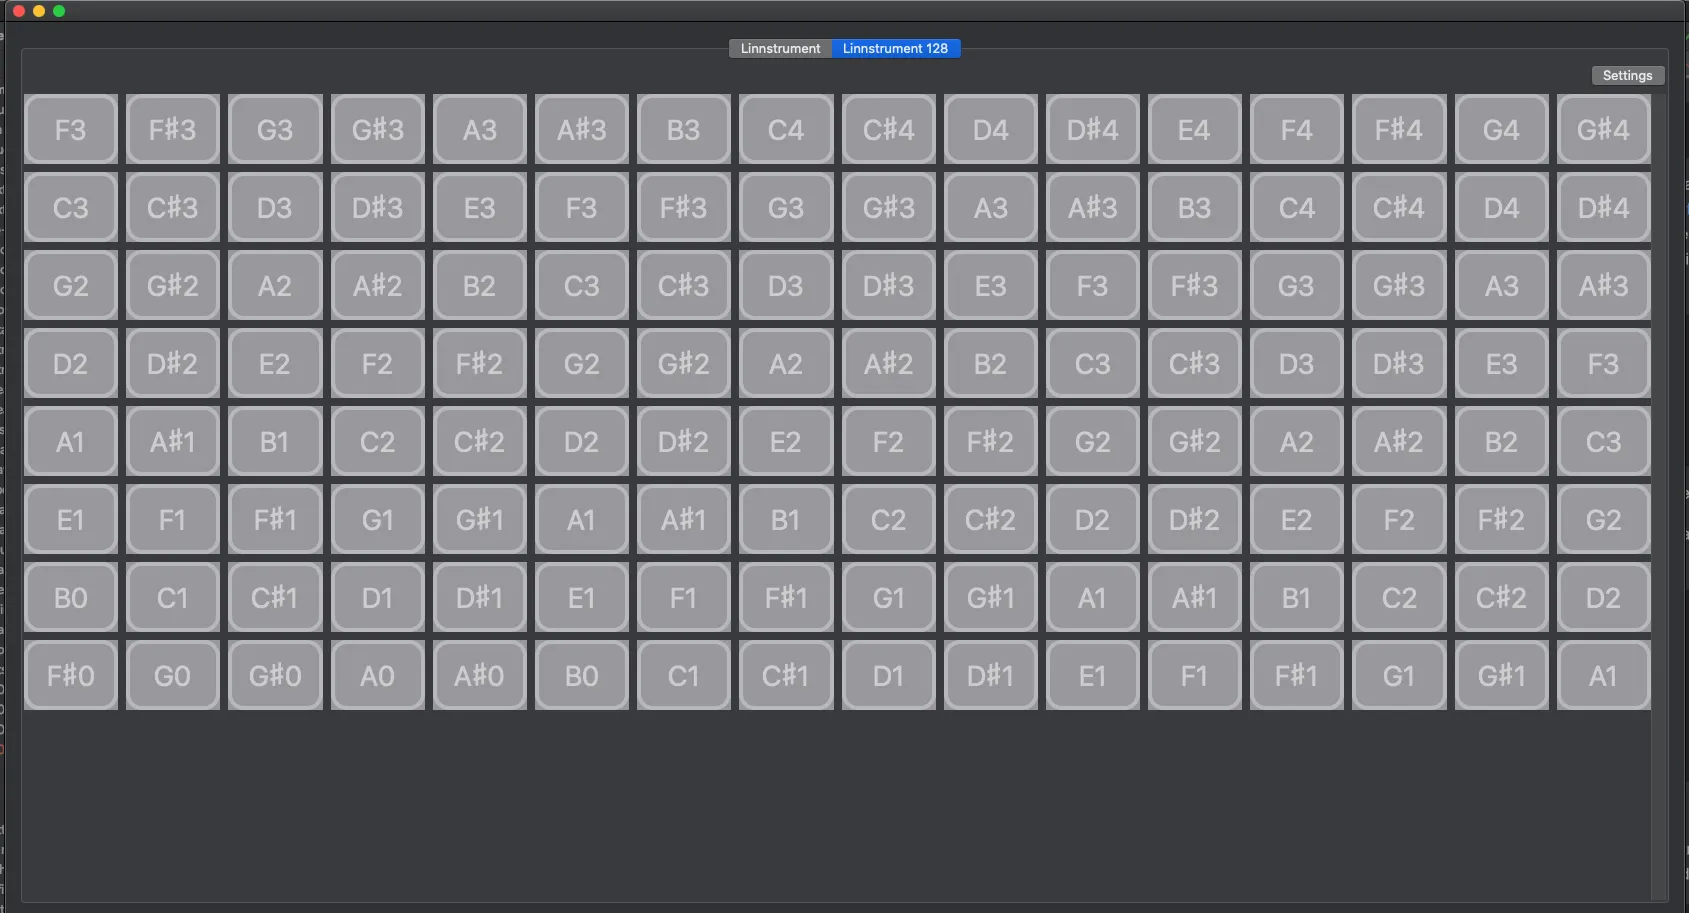
Looking good so far!
Part Two
The next step is to highlight each note pressed by the user to the corresponding elements on the grid. Like so:

In order to see how I discovered a solution, you can check out part two here!