· tutorials · 5 min read
Setting up Wiki.js with Docker Compose and an Nginx Reverse Proxy on Ubuntu Linux
Recently, I needed to setup a wiki for an archival project that I’m a part of. After some research, I decided to go with Wiki.js, a modern and performant wiki software which runs on Node.js. Although you can run Wiki.js without Nginx, I wanted to use it as Nodejs is pretty poor as a frontend. Serving static content, managing SSL, etc, is much better suited to Nginx. As I had a bit of trouble finding a clear guide on how to do all of this, I decided to share how I’ve set everything up here.
Installing Wiki.js With Docker Compose
Although you can use only Docker to setup Wiki.js, I decided to go with Docker Compose as it offers a number of benefits over just using Docker. As per the Docker docs:
Compose is a tool for defining and running multi-container Docker applications. With Compose, you use a YAML file to configure your application’s services. Then, with a single command, you create and start all the services from your configuration.
Compose works in all environments: production, staging, development, testing, as well as CI workflows. It also has commands for managing the whole lifecycle of your application
The first step is to install Docker and Docker Compose, and this can be done via the terminal on Ubuntu by running:
sudo apt install docker docker-compose
Once Docker and Docker Compose are installed, the next step is to create a docker-compose.yml file. In addition to installing Wiki.js, we will also need a database, and for this Wiki.js recommends Postgresql. In fact, according to this blog post “The upcoming Wiki.js release 3.0 will only support the PostgreSQL database engine. Other engines (MySQL, MariaDB, MS SQL Server and SQLite) are being deprecated.”
Inside my home directory, I created a new folder called wiki.js and placed the following docker-compose.yml file inside:
version: "3"
services:

  db:
    image: postgres:11-alpine
    environment:
      POSTGRES_DB: wiki
      POSTGRES_PASSWORD: dbpassword
      POSTGRES_USER: wikijs
    logging:
      driver: "none"
    restart: unless-stopped
    volumes:
      - /home/<your-user>/wiki.js/pgsql_data:/var/lib/postgresql/data

  wiki:
    image: ghcr.io/requarks/wiki:2
    depends_on:
      - db
    environment:
      DB_TYPE: postgres
      DB_HOST: db
      DB_PORT: 5432
      DB_USER: wikijs
      DB_PASS: dbpassword
      DB_NAME: wiki
    restart: unless-stopped
    ports:
      - "6830:3000"
You’ll need to replace the dbpassword with a password of your choosing, as well as modify the volumes: property to match the path you will be using. For the wiki ports, 6830 will be the port that Wiki.js will run on, and 3000 is the internal port used for the Docker containers. You can change the first port if you want, but take note of its value as it will be needed in the next step.
Now we can run Docker Compose to install and configure Wiki.js and Postgresql. Make sure that you’re in the same directory as your docker-compose.yml file, and then run:
docker-compose up
If all goes well, Wiki.js and Postgresql should now be installed and running, and we can move on to the next step.
Setting up the Reverse Nginx Proxy
Nginx is a lightweight webserver which is often used as a reverse proxy, and is a great choice for what we need. To get the reverse proxy running, we first need to install Nginx by running:
sudo apt install nginx
Next, we’ll need to setup a sites-available config. Using sites-available allows you to have multiple website configurations setup in Nginx. Inside /etc/nginx/sites-available, create a file named whatever your domain is. For example, if your domain is foo.com then the file should be named foo.com. Inside this file, paste the following:
server {
listen 80;
listen [::]:80;
listen 443 ssl http2;
listen [::]:443 ssl http2;

ssl on;
ssl_certificate /etc/ssl/certs/cert.pem;
ssl_certificate_key /etc/ssl/private/key.pem;

   server_name your-domain.com;
    location / {
        proxy_pass     http://localhost:6830;
        proxy_set_header Host $host;
        proxy_set_header X-Real-IP $remote_addr;
        proxy_set_header X-Forwarded-For $proxy_add_x_forwarded_for;
        proxy_set_header X-Forwarded-Proto $scheme;
    }
}
Change your-domain.com to whatever your domain is, and use the port that you specified in your docker-compose.yml file.
You’ll notice that I’ve setup Nginx to also listen on port 443 (SSL) and use a cert.pem and key.pem, and in the next section I’ll outline how to configure SSL so that https works on your wiki.
Next, you’ll need to create a symlink to your new config so that the domain is added to the sites-available. This can be done by executing the following command:
sudo ln -s /etc/nginx/sites-available/your-domain.com /etc/nginx/sites-enabled/your-domain.com
With the symlink created, reload Nginx:
sudo systemctl reload nginx
Adding SSL with Cloudflare’s Strict Mode
The final step is to add an SSL certificate in order to secure your website and enable https. Although you can create an SSL cert using Let’s Encrypt (I recommend using Certbot if you choose to go this route), I’m a fan of using Cloudflare as a CDN and so I decided to setup a certificate with CloudFlare instead. CloudFlare offers different modes for SSL, but for security reasons it is highly recommended to use strict mode for SSL.
Inside your CloudFlare account for your website, navigate to SSL/TLS —> Origin server and click “Create Certificate”. Next, choose “Generate private key and CSR with Cloudflare” and select RSA (2048) as the private key type. Your hostnames should appear automatically, and you can keep the certificate expiration at 15 years. Cloudflare will now take you to a page which contains your certificate.pem as well as your key.pem files. Create the following two files, then copy and paste the associated data into them:
/etc/ssl/certs/cert.pem;
/etc/ssl/private/key.pem;
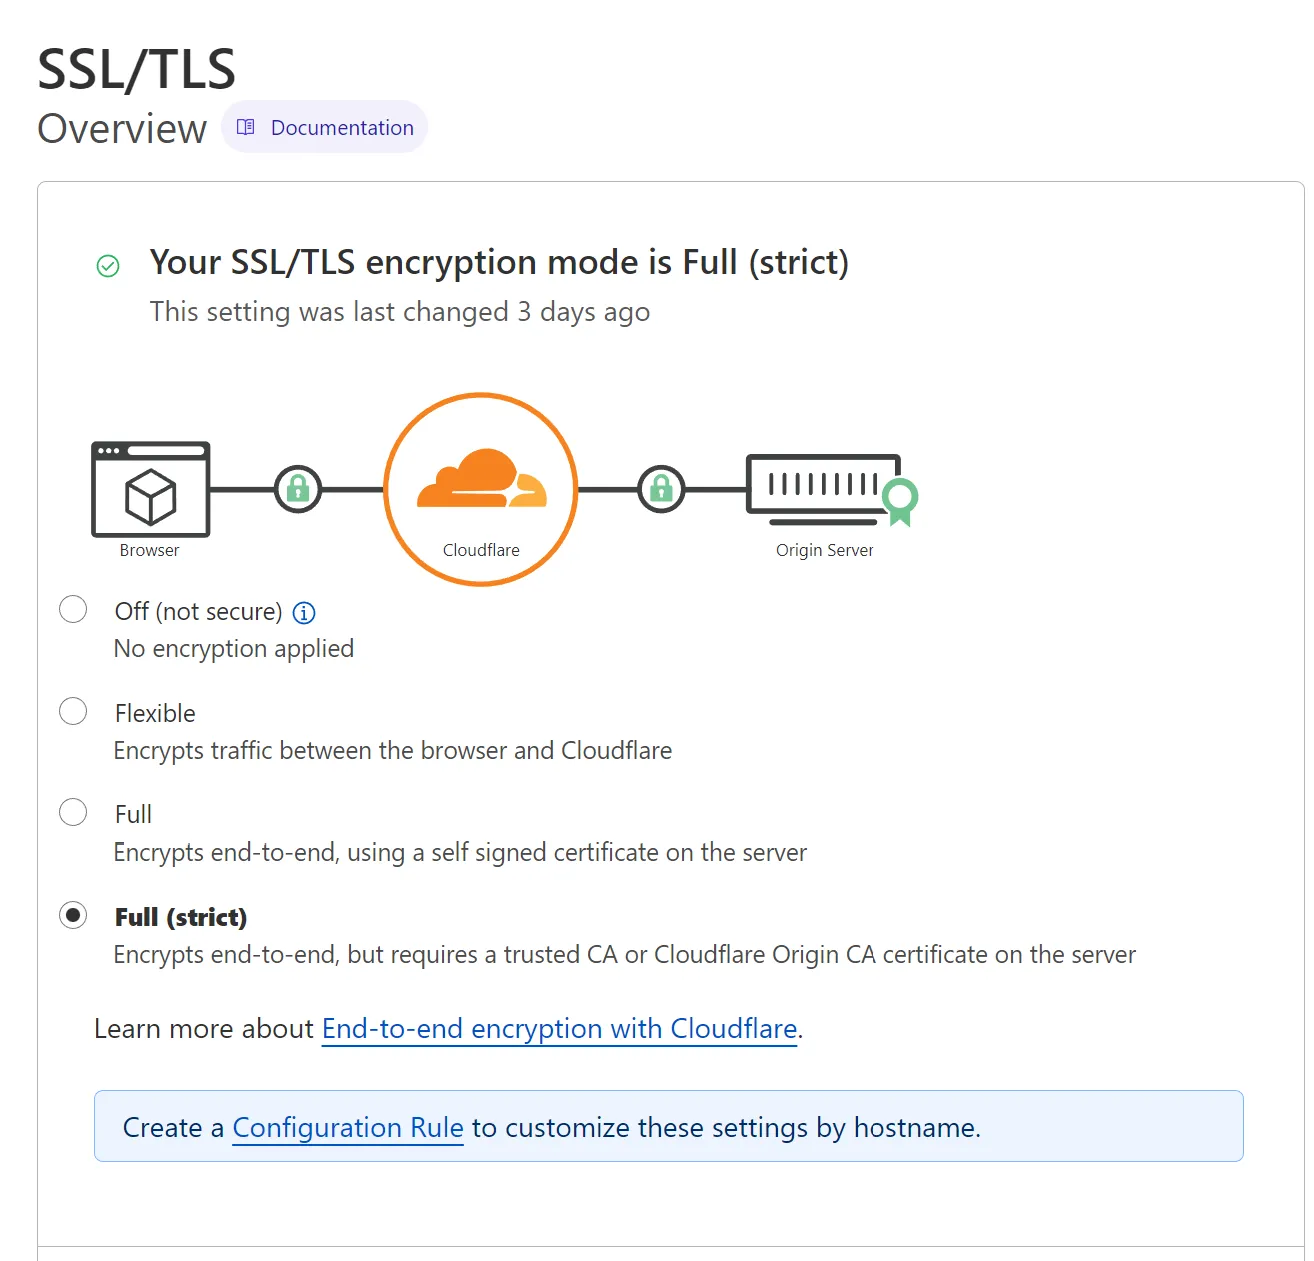
Lastly, navigate to the SSL/TLS page in Cloudflare and select Full (strict) as the encryption mode:

Congratulations! Everything should now be configured properly and your new wiki is ready to be accessed! If you have any questions, don’t hesitate to contact me.