· tutorials · 8 min read
Making a roguelike in C# using GoRogue and SadConsole (Part Two)
After setting up the GoRogue Helpers template and making a few basic changes to it in Part One of this tutorial series, Part Two looks to dig even deeper into the code and implement two additional features which will help manage the game’s lifecycle; a UIManager class as well as MessageLogger which will display status messages in a scrollable window.
Assuming that you completed part one, you should now have a basic game which compiles and lets you explore a fairly big dungeon map which contains static enemies that you can’t attack (yet!). From here, I created a new Git branch called “feat/ui-manager” which I used to track my changes.
Creating a UI Manager
The first thing that I wanted to do going forward, was to implement a proper UI manager. Fortunately, Part 8 of the Ansiware tutorial explains how to implement a UI manager in SadConsole, and we can use this code as a foundation for our UIManager class (yay open source!).
In your project directory, create a class called UIManager.cs and copy the the Ansiware code to use as a blueprint. Here I’ve modified the namespace to match my game name:
using Microsoft.Xna.Framework;
using SadConsole;
namespace RunicQuest
{
    // Creates/Holds/Destroys all consoles used in the game
    // and makes consoles easily addressable from a central place.
    public class UIManager : ContainerConsole
    {
        public ScrollingConsole MapConsole;

        public UIManager()
        {
            // must be set to true
            // or will not call each child's Draw method
            IsVisible = true;
            IsFocused = true;

            // The UIManager becomes the only
            // screen that SadConsole processes
            Parent = SadConsole.Global.CurrentScreen;
        }

        // Creates all child consoles to be managed
        // make sure they are added as children
        // so they are updated and drawn../../assets
    }
}
This is a lot of great base code! Note: For improved readability, I renamed Program.cs to GameLoop.cs moving forward.
The next step is to hook in the UI Manager to our MapScreen class. In the GoRogue template, the MapScreen class is called directly from our Main loop. Now, we’re going to change things around so that our UI Manager calls the MapScreen.
Currently, the MapScreen.cs file contains the following line of code:
internal class MapScreen : ContainerConsole
Since our UIManager extends the ContainerConsole base class, I wired it up to UIManager instead:
internal class MapScreen : UIManager
Keeping in line with Ansiware’s theme of encapsulation, the next step was to move the map generation code outside of GameLoop.cs and into the UIManager. In order to do so, I removed the references to the Map and viewport dimensions and added them to UIManager.cs instead:
    public class UIManager : ContainerConsole
    {
        // Set the map and viewport dimensions.
        public const int ViewPortWidth = 80;
        public const int ViewPortHeight = 25;

        private const int MapWidth = 500;
        private const int MapHeight = 500;
Note that the ViewPort height and width are set to a public constant. This is because we still need to use them inside our GameLoop.cs to create the main window like this:
        private static void Main()
        {
            // Setup the engine and create the main window.
            SadConsole.Game.Create(UIManager.ViewPortWidth, UIManager.ViewPortHeight);
Next, we need to create the Map inside of our UIManager class, and we do so inside of the CreateConsoles() method like this:
        public void CreateConsoles()
        {
            // Generate and display the map
            MapScreen = new MapScreen(MapWidth, MapHeight, ViewPortWidth, ViewPortHeight);
        }
CreateConsoles() creates all the SadConsole consoles to be managed, and makes sure that they are added as children, updated, and drawn.
Now we need to wire up the UIManager to our GameLoop. Firstly, we declare our UIManager:
    internal class GameLoop
    {

        public static UIManager UIManager;
and then hook in UIManager inside our init method:
            // Create our UI Manager and then spawn our consoles.
            UIManager = new UIManager();
            UIManager.CreateConsoles();
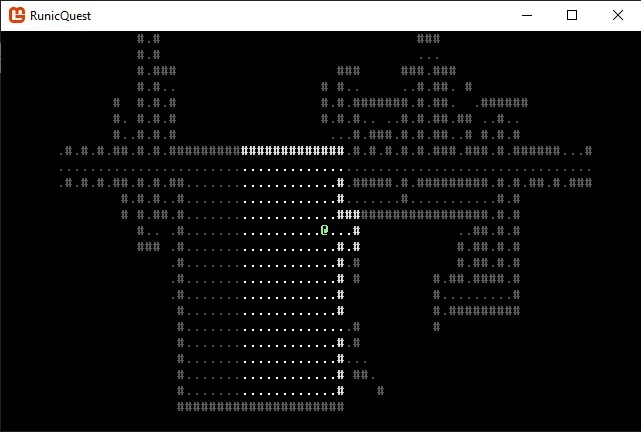
At this point, if you save and run the code you should see the following window appear:

Success! Although it doesn’t look any different, the GoRogue template map generator is now hooked into our freshly minted UIManager class! This will make the next step of implementing the MessageLogger class much easier. The final step was to merge my UIManager Git branch back into master and then off to the next step!
Implement a Message Logger
Now that we have a working UIManger, now is a good time to setup message logger functionality. Again, I’m going to be borowing code from Ansiware, this time from Part 9 of the guide. Before diving in, I took a moment to switch to a new Git branch using git checkout -b feat/message-logger.
Next, I created a new MessageLogWindow class amd inserted the following code:
using System.Collections.Generic;
using SadConsole;
using System;
using Microsoft.Xna.Framework;

namespace RunicQuest
{
    //A scrollable window that displays messages
    //using a FIFO (first-in-first-out) Queue data structure
    public class MessageLogWindow : Window
    {
        //max number of lines to store in message log
        private static readonly int _maxLines = 50;

        // a Queue works using a FIFO structure, where the first line added
        // is the first line removed when we exceed the max number of lines
        private readonly Queue<string> _lines;

        // the messageConsole displays the active messages
        private SadConsole.ScrollingConsole _messageConsole;

        // Create a new window with the title centered
        // the window is draggable by default
        public MessageLogWindow(int width, int height, string title) : base(width, height)
        {
            // Ensure that the window background is the correct colour
        //    Theme.WindowTheme.FillStyle.Background = DefaultBackground;
            _lines = new Queue<string>();
            CanDrag = true;
            Title = title.Align(HorizontalAlignment.Center, Width);

            // add the message console, reposition, and add it to the window
            _messageConsole = new SadConsole.ScrollingConsole(width - 1, height - 1);
            _messageConsole.Position = new Point(1, 1);
            Children.Add(_messageConsole);
        }

        //Remember to draw the window!
        public override void Draw(TimeSpan drawTime)
        {
            base.Draw(drawTime);
        }

        //add a line to the queue of messages
        public void Add(string message)
        {
            _lines.Enqueue(message);
            // when exceeding the max number of lines remove the oldest one
            if (_lines.Count > _maxLines)
            {
                _lines.Dequeue();
            }
            // Move the cursor to the last line and print the message.
            _messageConsole.Cursor.Position = new Point(1, _lines.Count);
            _messageConsole.Cursor.Print(message + "\n");
        }
    }
}
The following step was to declare the MessageLogWindow inside my UIManager class, and then add the following code to the CreateConsoles() method just below the map generation code:
// Create the message log window and set its position.
MessageLog = new MessageLogWindow(ViewPortWidth, ViewPortHeight / 4, "Message Log");
Children.Add(MessageLog);
MessageLog.Show();
MessageLog.Position = new Point(0, 20);

// Print a test message
MessageLog.Add("Testing 123");
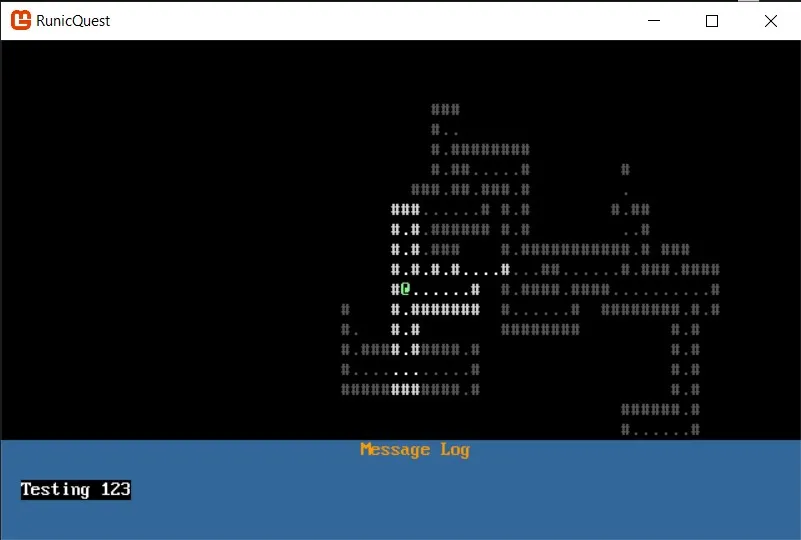
Much like we did with the MapScreen, we create a MessageLog and then add it as a child of the UIManager. We then display the message log at position (0, 20), and finish display a test message. I played around with the size parameters of the MessageLog for a bit, and I liked how this looked through trial and error.
Running my code at this point produces the following result:

Looking good! The great part about the UI Manager is that we can move the message logger window around by dragging it should we so choose.
Add Scrolling to the Message Logger
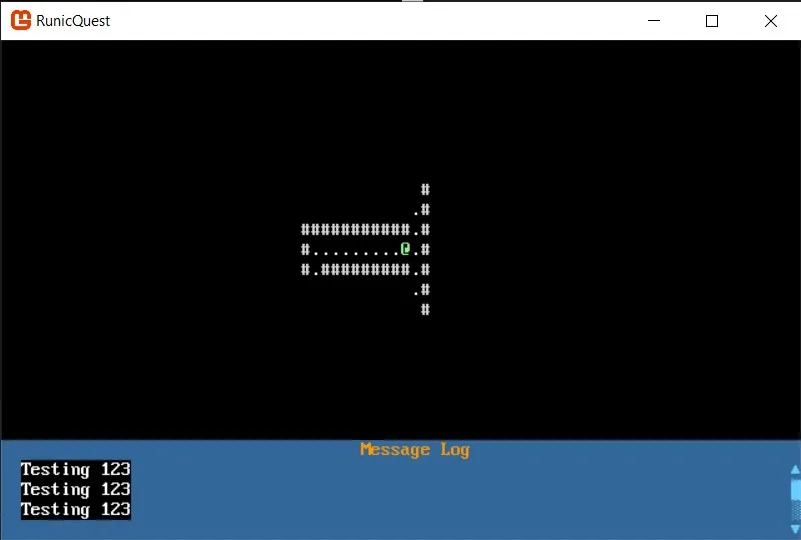
Since a lot of action will be happening in our game, we need a way to handle streams of event text, and the best way to do so is to add a Scrollbar to our MessageLogWindow. In order to do so, take a look at Part 9 of Ansiware’s tutorial, and integrate the code he provides into your MessageLog.cs. His explanation of the MessagerLogger is terrific, and there’s no point in reinventing the wheel! This is also a great little challenge to help you stray from the tutorial a bit (and avoid tutorial purgatory! Should you get stuck, you can take a look at my commit here which was when I merged my feat/messager-logger branch into the master. Building the code at this stage looks like this:

The scrollbar looks great! Not only does it display status messages it also lets us save space. Going forward, its likely that I’ll customize the colors of the window, but this will come later on when I have more base functionality in place.
As an aside, at this point I created a Github workflow in order to setup continuous integration through Github actions. With CI now setup, the next step is to write some unit tests (which I’ll be covering in a future post!).
Conlusion
In this part of the roguelike tutorial, we extended the functionality of our game significantly by creating a window manager and then adding both the game map and a scrolling message log! With a basic UI in place now, we can now start to think about the gameplay a bit more, and in the next step of the tutorial we’ll look into creating a basic combat system!